PDP Exclusives by Rebecca
Showing posts with label Ask Krissi's Art Studio. Show all posts

Wednesday, November 28, 2012

FREE Printable Skelekitty Gift Tags


Howdy all.  Krissi here.  Every now and then I like to make special items available for free.  From a marketing standpoint, it's good publicity.  From a human standpoint, it's just good.

So I'm happy to offer to all you Rosies out there, some FREE non-denominational Skelekitty gift tags/stickers (suitable for non-holiday gift-giving, too)!  You don't even have to buy anything from me.  :)


Just click on the image you would like (yep, you can have both - nobody is keeping track).  Then, from my Flickr page, click "Download original size of this photo" to save the full sheet of tags to your computer.  Print them out, cut them and attach them to gifts (handmade, of course)!


Happy Hanukkah, Merry Christmas, Blessed Solstice, Happy Festivus and/or Positive Mid-Winter Celebratory Greetings to you all, however you acknowledge these cold and short days indoors.

Love,  Krissi and Skelekitty


Krissi Sandvik is a mixed-media artist and the owner of Krissi's Art Studio, home of Skelekitty and Friends. She was recently named "best tutorialer on the web" by her friend Rachelle Rose.

Wednesday, May 16, 2012

Ask Krissi's Art Studio: Easy/Quick DIY for Cleaning Silver

Union Riveter Krissi Sandvik is back with another tutorial. This one would be fun to do with the kids over the summer - it's housework disguised as a science project!
Here is a DIY on how to quickly clean that pesky tarnished silver without any elbow grease using stuff you have around the kitchen.


Krissi Sandvik is the artist and owner of Krissi's Art Studio, home of Skelekitty and Friends in Folsom (yes, like the prison) California, where she resides with her husband, cats, tortoise and Jack Russell Terrier, Abby. Krissi, claims to have been raised by a pack of wild attorneys, was unofficially named "best tutorialer on the web" by her friend Rachelle Rose .

Thursday, April 5, 2012

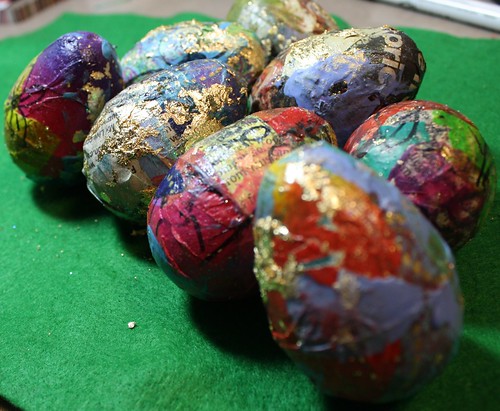
Tutorial for Urban Easter Eggs by Yoli!

Hey there, it's your long-lost Union Riveter Krissi here, taking a break from prepping for a big art show to share a fun Easter tutorial from one of my crafty Sacramento pals, Yoli Manzo of Sacred Yoli Designs!  As she puts it, this tutorial will give those (plastic) Easter eggs some "street cred!"  Go to it!

Get your street art on this Easter with a cool urban graffiti tutorial from Sacred Yoli Designs
This tutorial would be fun for just about anything - you really aren't limited to the Easter holiday or eggs!

Krissi Sandvik is a mixed-media artist, DIY group Corporate Rejects member and the owner of Krissi's Art Studio, home of Skelekitty and Friends. She was recently named "best tutorialer on the web" by her friend Rachelle Rose.

Sunday, March 25, 2012

Recipe: Vegetarian Indian Paneer Butter Masala

Union Riveter Krissi is switching from studio-mode to kitchen-mode today for a recipe! 

Long time, no see, fellow riveters!!!  Once again, my pal and neighbor Bindavi comes through with a tasty and authentic vegetarian recipe - this time it's on her blog and it's called Paneer Butter Masala.

BUT WAIT!!!!  Before you run off to attempt the recipe yourself, let me fill you in on a few of  'Krissi's white-girl tips for cooking Indian food.'


First, let me answer the "what the heck is paneer?" question:
Paneer is basically Indian cottage cheese - however, instead of being a globs of curds in milky whey, the moisture is squeezed out and the curds are formed into a block.  Paneer has a similar texture to very firm tofu, but has a bit more flavor and has a melted consistency when fried properly.  You can find it in most markets near the tofu, in your local Indian grocery and even at Costco!  Paneer can be served in various curries and is even found in some rice and salad recipes. It is low fat, high protein and did I mention, while it's a "cheese," it is made without rennet.  There are also quite a few easy recipes on the internet for making your own paneer.  When I try it, I'll be sure to let you all know!


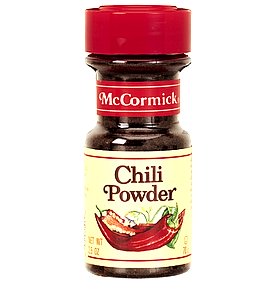
Next - some ingredient clarification.  British-English from India is NOT the same as American English in many situations.  For example, in America, when we see "chili powder" in a recipe, we reach for this:

Ingredients: Chili Pepper, Cumin, Oregano, Salt, Garlic

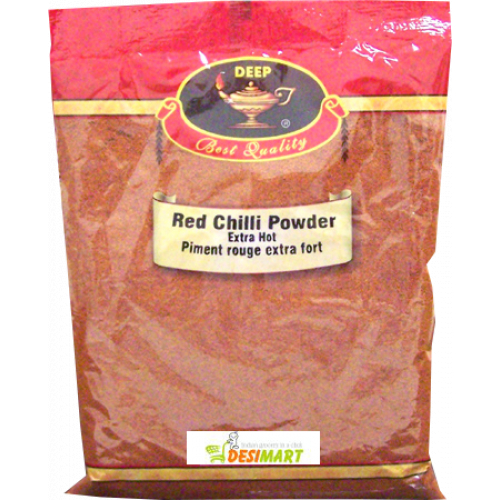
But in an Indian recipe/grocery, it means this:
Ingredients: Red Chili Peppers

Bindavi and I had a good laugh at that.  I did have some Cayenne Powder in my pantry that was unopened, so I grabbed that!

More on spices: do yourself a favor and if your cumin/coriander, etc. have been open for a while, toss them and replace them.  Seriously.  If you have any questions, find your local Indian Grocery and ask questions.  I've always found local small shopkeepers to be infinitely helpful.  While my containers of spice were new, we ended up doubling most of the spices to achieve the right taste.

Bindavi grinds her cashews in a coffee/spice grinder to a very find powder, but I used my small Cuisinart and it came out with a corn meal consistency.  My gravy came out less creamy, but had a nice ground beef texture.  It takes a little practice.

When you deep fry the paneer, it's messy unless you have a well seasoned cast iron pan or a non-stick pot.  Otherwise, just go with it.  Make sure the oil is HOT before you fry your paneer so it will soak up as little oil as possible.

Final tip: when cooking down the tomatoes, look for the oil and tomato to 'separate' a little.
you can see the oil 'separating' in the center of the pan
when you see this, the tomatoes are finished cooking down

Paneer is fast becoming one of my meal staples.  It's low fat, high in protein, low in carbohydrates and tastes YUMTASTIC!  Expect a link to a spinach paneer recipe from Bindavi in the near future!

Well??  What are you waiting for???  Go try that recipe now!


Bindavi's blog, KurtiTown.blogspot.com features authentic Indian recipes, cultural tidbits and fashion.  Visit her shop on ArtFire to see her collection of Indian style tunics called kurtis. These tunics are rich in embroidery, brocade work and embellishments designed on high quality fabric. Kurtis can be paired with your favourite jeans, pants or leggings and by interchanging the kurti with different pants, you can create a completely new look every time you wear one of our creations.


Krissi Sandvik is a mixed-media artist, DIY group Corporate Rejects member and the owner of Krissi's Art Studio, home of Skelekitty and Friends. She was recently named "best tutorialer on the web" by her friend Rachelle Rose.  She loves Indian food.  And Mexican food.  And Thai food.  And....

Friday, December 23, 2011

Spot Removal: Think Outside The Cage

Krissi has returned from the successful Help Hank project and is posting on Modern Rosies again!  Today she has one of those great "off label" uses for a product every house should have - especially if you have children or pets.  Or husbands...  ;)

I keep a product in my house that is nothing short of magic.  A little birdie told me about this product.  OK, he wasn't little.  And, to tell you the truth, there were two of them:

Oscar (Military Macaw) and Charlie (Blue & Gold Macaw)
Macaw parrots I met during my days as Development Coordinator
for a  parrot rescue and education organization.
The magical product is called "Poop-Off" and is a biodegradable product intended as a completely non-toxic way to clean bird cages.  Anyone who has tried to remove dried bird poop from their car will know it isn't easy to clean up.  What you may not know is that birds have very different respiratory systems than other vertebrates and are, as a result, susceptible to poisoning from airborne particulate matter and toxins that you and I wouldn't even notice.

by "I Have No Shirt"
on SKREENED.com
You see, that's why coal-miners carried canaries with them. When Mr. Canary went feeties-up in his cage, the miners knew it was time to leave the mines lickety-split and get some fresh air.  Of course, by then, it was too late for the canary, but that's not what we're here to talk about.  I've only mentioned Mr. Canary so you know that if a product is safe enough to spray around birds, then it is safe to use around humans! Yep, even around babies or if you have allergies, asthma or chemical sensitivities - I know.  Cool, huh?

So now that we've got the safety aspects covered on this, let's get on to what truly makes Poop-Off so magical.  IT REMOVES EVERYTHING.  Well, most everything.  It doesn't work on mothers-in-law, but it really is miraculous.  We always keep a couple of spray bottles and a gallon of Poop-Off in our house.  So far we and our friends in the know have used this to remove:
  • Outdoors
    • Bird poop from cars, lawn furniture, etc. (duh)
  • Carpet Spot Removal (includes upholstered furniture and your car interior!)
    • Cat pee smell   <--- this alone should tell you how magic this is
    • Cat and dog pee stains
    • Barf stains (Kid, cat and dog in origin)
    • Kitty/doggy poop
    • "Who spilled something?" mystery stains
    • Kool Aid  and wine spills
  • Laundry Pre-Treatment
    • Grass stains
    • Berry stains (blueberries, strawberries, etc.)
    • Protein drink stains
    • Chocolate
    • Blood
    • Poop (new Moms will appreciate this)
    • "What did you spill on this?" mystery stains
How to use this magical product.

  • Blot up as much of the offending spillage as possible (DO NOT RUB)
  • Saturate area with Poop-Off
  • Allow it to sit for a few minutes
  • Blot up Poop-Off (DO NOT RUB)
  • Repeat as necessary
  • For laundry treatments, I saturate the spot as soon as I discover it, and once again before putting it in the washing machine.
Poop-Off is relatively easy to find online.  It can be ordered from Drs. Foster and Smith and if you have a local PetCo, you can find Poop-Off in the bird section.  But don't be fooled into thinking that you can get whatever enzymatic cleaner your local pet shop has on the shelf.  I've tried them ALL and this is the only one the actually works.  It's the only one that is magical.  

Go get some before the holiday spilling really gets going!


Krissi Sandvik is a mixed-media artist, DIY group Corporate Rejects member and the owner of Krissi's Art Studio, home of Skelekitty and Friends. She was recently named "best tutorialer on the web" by her friend Rachelle Rose and she publishes a tutorial or "Ask Krissi's Art Studio" feature on Fridays here at Modern Rosies.

Friday, November 18, 2011

All I Want For Christmas Is Handmade, Too

UN-occupy Black Friday!!!!  The handmade community hopes that, if you purchase gifts this holiday season, you will support your fellow artists and local economies by purchasing from from small shops and handmade artisans.  From whom?  Well, Krissi's Art Studio is here to tell you what she loves.


If I had ALL the money in the world, I'd live in a palace of handmade goods.  As it is, I, like most, have to budget.  Here are a few of the items at the top of my handmade-holiday wish list!

The first thing on my OMG-I-LOVE-THIS list are these salt & pepper shakers by Sara Lynch (you can find Sara on Etsy, Facebook and Google+).

Super cute snail and hedgehog ceramic salt n pepper shakers
by Sara Lynch.  I love hedgehogs.  A LOT. 

What I REALLY wanted from Sara were her zombie pie birds.  I wanted them so much, that I didn't bother dropping hints to my hubby - I just bought two of them.  Tell her you want more.  I know a few people who want their own too!  I mean, come ON!  ZOMBIE PIE BIRDS!  I will have the coolest Thanksgiving and Christmas pies EVER.


Next, ANYTHING by Aaron Tyndall of FeralDesigns, but especially this amazing pink pearl, crystal and glass wire wrapped set.
Aaron has a wicked sense of humor, an incredible talent and an Irish Brogue
 -- and seriously, who needs more than that?


Since I started interacting with Aaron online, I wonder how I ever lived without him in my news feed!  His work is fun and creative, and his customs really keep the customer in mind - look at this piece he made for our own Brooke!


Oh, the things I want from MT Coffinz...  Let me count the ways!  First, this:

and this: 
...both from MTSpaces on Etsy, Jinx's newest shop featuring awesome household items. 

Also, these fingerless gloves are also from Jinx in her MTCoffinz shop, and they are an absolute necessity for those of us who work in chilly studios, but need our hands free.  I may be a Scrooge about turning on the heat, but I don't have to look like Bob Cratchit!  


From Brazen Cosmetics (on both ArtFire and Etsy), I would want a full pot of "Submission.


Sandi, the makeup artist behind Brazen, is AMAZING with her 'near black' colors and, while I have a sample of this one, it's not going to last much longer (hint, hint).  

Finally, I want a Baby Buttshark sculpture from Scott Krichau.  Like I REALLY REALLY want one.  
They're not listed in his shop at the moment, but if you see one come up for sale, please message me, m'kay?  I'm kinda liking a blue one.  Or green.  Or pink.  Or whatever.  I just want one.


Oh yeah.  And peace on Earth.  That would be nice too.  If the handmade community was in charge of that, we'd have it solved by now.

Whatever you believe or celebrate, I hope your winter holidays are awesome.  Lotsa love!


Krissi Sandvik is a mixed-media artist and the owner of Krissi's Art Studio, home of Skelekitty and Friends. She was recently named "best tutorialer on the web" by her friend Rachelle Rose and she publishes a tutorial or "Ask Krissi's Art Studio" feature on Fridays here at Modern Rosies.

Friday, November 11, 2011

Ask Krissi's Art Studio: Funkified Tea Tins Tutorial

Union Riveter Krissi Sandvik is back with another fun and very colorful tutorial.  This one would be fun to do with older kids, and these tins make great gifts!


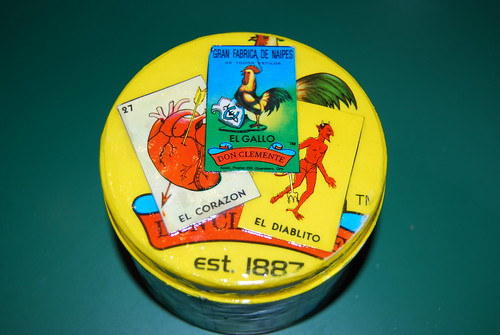
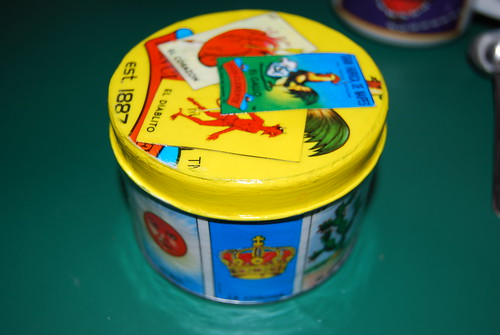
I'm a tea addict.  I picked the habit up in the UK and have since collected tea cups, kettles and pots.  I buy my teas loose and in bulk from a local shop, the owner of which keeps me supplied with all my favorite black teas.  A tin is great way to keep your teas fresh and tasty, while showing off your personal taste! Here's what you'll need to get started:
  • tea tin or airtight container
  • appropriate glue for your choice of materials
  • decorative paper
  • varnish of your choice
  • acrylic paint (optional)
  • sandpaper (optional)
  • tea (duh!) or coffee or cocoa or ... you get the drift
The Tins:
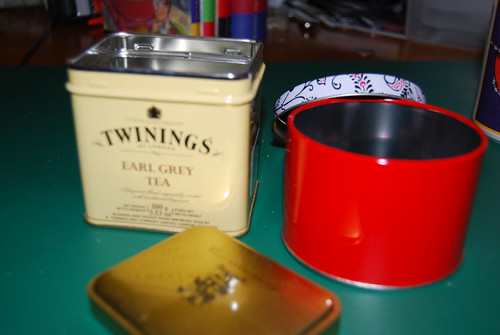
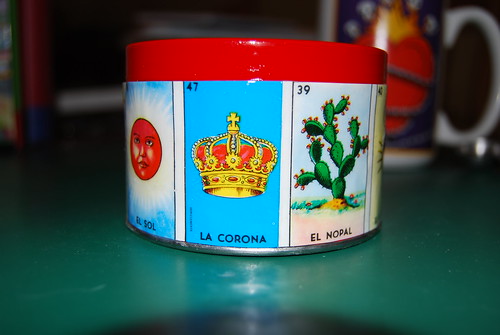
I found some great tins on clearance at a local craft store
You can also re-use tea tins or other airtight canisters
Measure:
  • the height of the tin from the bottom of the lid. There is a little lip on the Twinings container showing where the lid is positioned when on.  You want to make sure you don't cover above that point (it would make the tin too "fat" for the lid to fit).
  • around the tin
  • Alternatively, you could make a template with some newspaper, a pen and some scissors.
Mark the lid position using a fine-point permanent marker just to be sure you don't glue the paper up too far, unless your tin has an existing guide (like the Twinings tin).

The Ephemera:
Even though I don't papercraft often, I have a HUGE collection
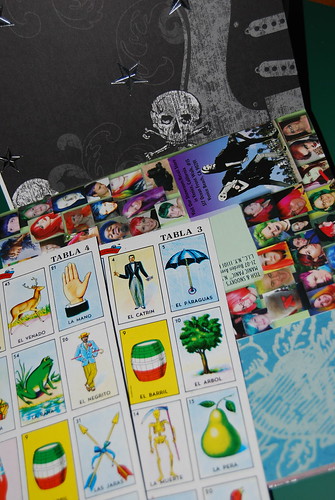
Gather your decorative papers. You can use scrapbooking papers, Loteria tablas (as I did), junk mail, catalogs or just about anything flexible enough to glue to a tin!  Remember, use only images in the public domain or that you have permission to use.  Even if you're not selling these items, you may not use someone else's art or images.

Trim your papers to fit within the measurements you took in step 2.


The Adhesive:

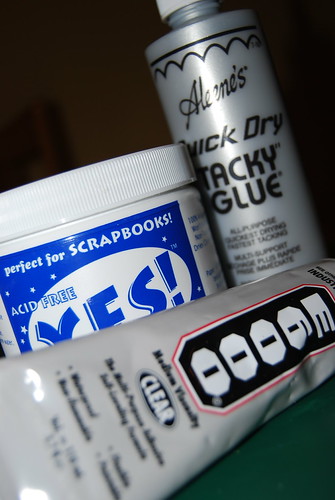
Choose an adhesive that works best with your materials. For metal tins, use a solvent based gel glue like E6000 or Liquid Nails. If you have a foil-lined paper canister (like a cocoa container), you can use a tacky white glue or my new personal fave, YES! paste.
One of these days, I'm gonna hafta write me a blog post on adhesives
Spread adhesive evenly over the surface to be covered. DO NOT spread glue over the lid-line. If you are using an industrial-strength solvent glue, you will need to work quickly and in a ventilated space (you twisted little glue-sniffer).


DO IT ALREADY!

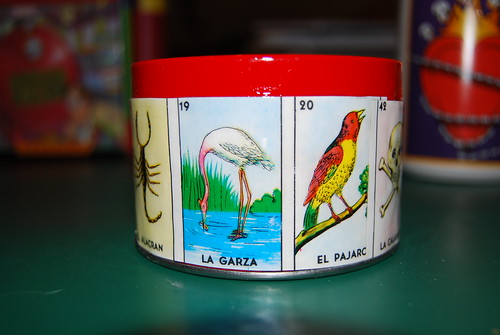
Apply your pretty papers and let your glue dry.


Repeat the process with your lid.  I chose to sand off the existing finish and paint the sides of my lid in a color that I matched to one of my papers. You could also use spray paint, tiny scraps of paper or a thin paper that would easily wrap from the top to the sides.


The Finishing Touch:

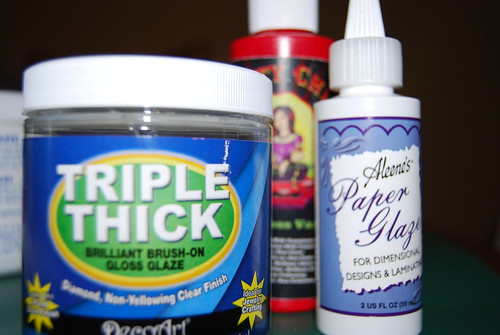
VARNISH it baby! You want to protect your work, don't ya?

There are a plethora of varnishes from which to choose, so pick your favorite whether it's gloss, satin or matte.  My personal favorite is Golden Acrylic's polymer varnish in gloss (not shown)
Wipe off any varnish that creeps up over the lid-line of the tin or under the lid. Ensure that the varnish is not just dry, but allow plenty of time for it to cure before you handle - some varnishes take days to cure in cool or humid weather.


Use:

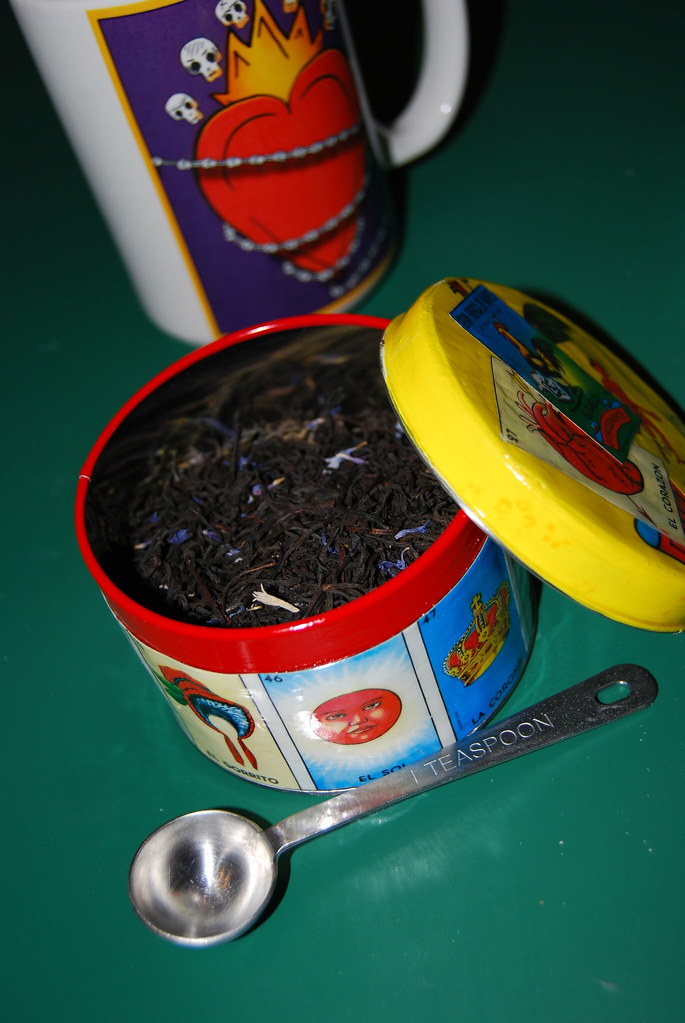
Start rockin' the Earl Grey with your awesomely cool tin!

My tea tin, tea and my favorite mug - design by Ladi Loera
I agree to look the other way if you were inclined to use your tin of awesomeness to hold office supplies, sugar cubes, spices, doggie treats or other tiny necessities of life.


Krissi Sandvik is a mixed-media artist and the owner of Krissi's Art Studio, home of Skelekitty and Friends. She was recently named "best tutorialer on the web" by her friend Rachelle Rose and she publishes a tutorial or "Ask Krissi's Art Studio" feature on Fridays here at Modern Rosies.

Friday, November 4, 2011

Krissi's Quick Pick: Craft In America

Hi all, Union Riveter Krissi here with a quick pick for today.

As the daughter of a lawyer-turned-woodworker/stained glass artisan, I was fascinated by the initial episodes of the Craft In America documentary when they aired in 2007, and wanted to share this fascinating project dedicated to the exploration, preservation and celebration of craft and its impact on our nation’s cultural heritage.


Since it was originally released, Craft In America has grown from a small and fascinating PBS special to a non-profit educational resource for all things related to American handicrafts.  PBS is currently airing the third season of this award-winning series and have expanded their resources to include a full website, Facebook page, iPhone/iPad app, beautifully photographed book, exhibition and study center.

I especially like how the crafts are broken down by materials/medium.  You can browse through crafts in metal, glass, clay, fiber, paper/books and wood, and then start with the history of those crafts, or go straight for one of your favorite artists, if you like.

I hope if you haven't seen this series, that you will; if you have, that you'll watch the new episodes; and if you've yet to explore the website, that you'll take a minute to do that.

Happy clicking!

Krissi


Krissi Sandvik is a mixed-media artist and the owner of Krissi's Art Studio, home of Skelekitty and Friends. She was recently named "best tutorialer on the web" by her friend Rachelle Rose and she publishes on Modern Rosies every Friday.

Friday, October 28, 2011

Krissi's Art Studio: Sugar Skull Masks!

Union Riveter Krissi Sandvik created some fun masks this week modeled on Mexican Día de los Muertos sugar skulls, and now she's going to show you how to make your own!

My friend and hairdresser, Betty, and I talk about Mexican folk art and culture constantly.  Her heritage is Mexican, while I first became enamored with all things Mexico when I lived in San Francisco's Mission District, a vibrant neighborhood with a large Latino population. I really love Day of the Dead, which mixes both Aztec and Spanish beliefs and cultures into something new and wonderful. This holiday particularly appealed to me as it focuses on death as a part of life and not as something to be feared.  Well this year, Betty is teaching a series of classes (she teaches for Paul Mitchell) with a hair/fashion show.  In Mexico City. On Dia de los Muertos, and she asked me to make some sugar skull masks for the models!  Woo hoo! Here's what I came up with:


You will need:
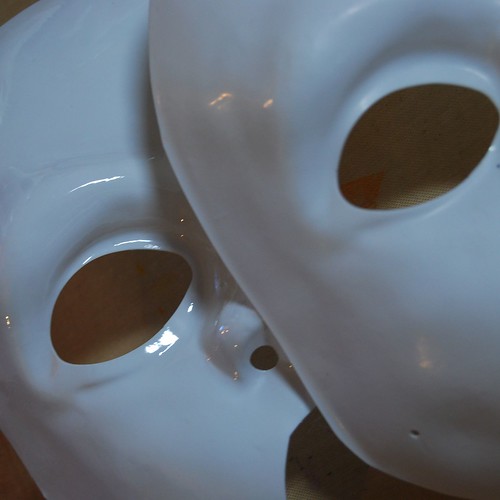
  • Mask - plastic, Papier-mâché, or even ceramic if you are creating a wall decoration
  • Rubbing alcohol
  • Glue - choose one that is appropriate to the substrate of your mask
  • GLITTER! - lots of it in lots of colors!   You can use just about any type of glitter (loose or glitter-glue).  DO NOT USE antique German glass glitter or any glitter made of glass.  It will be near your face (and eyes), so let's not go blind, m'kay?
  • Paintbrushes for glue, water, toothpicks, paper towels, fluffy paintbrush for brushing away loose glitter
Optional supplies:
  • Plastic primer
  • Clear/white glitter spray (I didn't use this, but will point out where you could)
  • Glitter tray or folded paper to return loose glitter to jars
  • Dryer sheets <--- secret weapon when using glitter!
Betty chose some 1/2 face 'Phantom of the Opera' style masks, but you could use eye masks or full face masks if you prefer.  You could use plastic, papier mache, fabric masks or even ceramic ones for a cool wall hanging.

primer
unprimed mask (left) and mask with adhesion
promoter and matte white primer (right)
1.  Remove the elastics and set them aside, then clean the masks with some rubbing alcohol to remove any residue or fingerprints.

1a.  OPTIONAL STEP - skip if you just need the mask for one night.  Since these masks will be packed and taken with Betty to Mexico, I chose to prep my masks to ensure the best contact between the products and the mask.  I started with an adhesion promoter for plastics (from the auto section of my local hardware store) and then added a layer of matte white primer for plastics (don't use gloss or you'll be back where you started).

blackbase1b. OPTIONAL STEP: You could spray your entire mask with clear glitter spray at this point to give the entire face a "sugary" look!

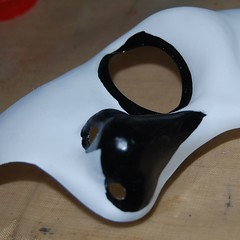
2.  Paint or sketch an outline of the shapes you want to create.  Painting your shapes first helps to make sure the glue goes where you want (working with white glue on a white mask is a bit confusing).  Also, pre-painting helps to prevent the white from peeking through the spaces in the glitter, I painted the nose and around the eyes with black paint (I tried at first with sharpies, but they were a bit trickier on the "topography" of the mask - a brush is more forgiving).

IMPORTANT TIPS! 
  • If using loose glitter and glitter glue, START WITH LOOSE GLITTER first
  • WORK FROM DARK TO LIGHT COLORS!  It's much easier to get a grain or two of yellow out of your black sections than to get black out of your yellow, etc.  Trust me on this one.


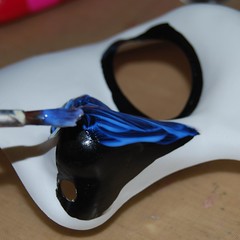
glue 3.  Brush your glue over the DRY painted area (a brush gives you more control and precision than squeezing from the bottle).  I chose a flexible fabric glue for gems and beads, because I expect the masks to flex a bit during travel.  Most people would get great results just using a good quality white craft glue.

IMPORTANT TIP!  WORK WITH ONE COLOR OF LOOSE GLITTER AT A TIME.  Don't paint glue on for more than one color of glitter.


4.  Pour that glitter on!

Crafty Chica Be-Bob Black glitter
by Duncan Crafts
Tips - using a glitter funnel/tray is very helpful (mine is a Tidy Tray which I scored for a few bucks at a craft show), but if you don't have one, you can use a piece of paper, folded in the center to return unused glitter to the bottle.  Want another tip?  Rub a dryer sheet over the surface of your funnel tray or paper before sprinkling glitter - it will keep the glitter from sticking and return more to the bottle for you to use later!

5.  Repeat for each color of loose glitter.
pattern traced with a silver Sharpie
Glue painted over spiderweb pattern
Pour that glitter!
This is Tulip (by Duncan) superfine holographic silver washable glitter.
I could NOT live without this product.


6.  Did you miss a spot?  No worries!  Just pick up some glue on a toothpick or bamboo skewer and fill in the blank spots, then add more glitter.
I love bamboo skewers and keep them in my craft drawer at all times.
This glitter is Crafty Chica's Pop Star Purple by Duncan
Let the loose glitter set/dry between layers OR if using glitter glue next, you can move on immediately.

8.  When you re finished with your loose glitter application for the day, you can start applying glitter glues.
I love glitter glues and swear by Ranger's "Stickles" glitters;
while the bottles are small, they last a long time and are very fine
 and acid-free.  You can find them at most crafting or scrapbooking shops.
Sometimes I like to blend colors together, like the yellow, orange and red in the flames.
Once again, toothpicks and bamboo skewers are VERY helpful!  Just run them back and forth in the glitter and you end up with an artsy fartsy look.

9.  After everything dries (I let it dry overnight), brush off the loose glitter with a fluffy paintbrush.

10.  If you like, you can add some silk or crepe paper flowers.  I attached these with a little hot glue and some E6000 (because they were traveling to Mexico - yours will be fine if you use hot glue).
A few flowers from the Dollar Store and a plastic skull from the Halloween section at my local craft shop!
Leaves and flowers from the Dollar Store, and a plastic skull bead glued to a butterfly from my local craft store.


THAT'S IT!  Now you can just reattach your elastics and rock the party!

Let me know if you have any questions - I'm happy to answer them here.

If you make one, please post a picture on our Facebook page or drop me a note.


Krissi Sandvik is a mixed-media artist and the owner of Krissi's Art Studio, home of Skelekitty and Friends. She was recently named "best tutorialer on the web" by her friend Rachelle Rose and she publishes a tutorial or answers a question from "Ask Krissi's Art Studio" every Friday.

Friday, October 21, 2011

Krissi's Packing Tape Image Transfer Tutorial

Union Riveter Krissi Sandvik is sharing her most popular tutorial of all time today! "Image Transfers" are a great way to layer ghostly images in your mixed media pieces, collages and polymer clay, they can be used as inclusions in resin jewelry and are a great way to transfer printed text to your work.  There are multitudes of image transfer techniques that use various printers, transparencies, solvents, Polaroid photos... the list continues to grow.  This is one of Krissi's favorite techniques - it's cheap, quick and easy! (originally published by Krissi's Art Studio on 2/17/2010)


Almost every single one of my mixed-media pieces has some kind of an image transfer in it.  Some are gel medium transfers (we'll do that another day, OK?), but most are packing tape transfers.  I prefer them because they are FAST and really easy.  If you goof up, you don't have to wait hours to fix your mistake.  Packing tape is also great for transferring text onto just about any surface you can imagine.

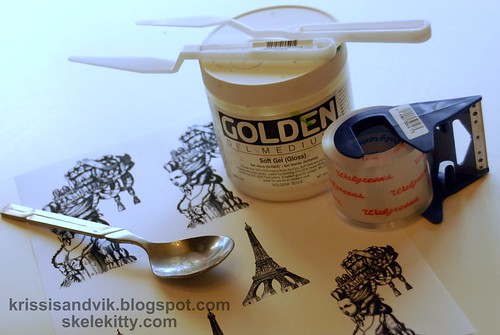
You will need:
  • laser printed* graphics** or text
  • brushes/spatulas
  • clear packing tape
  • a bone folder or spoon
  • gloss gel medium in soft or regular (I prefer regular for uneven surfaces)
  • scissors
  • a small bowl with water
  • paper towels
Tape Transfer tutorial
*NOTE:  I use a pigment inkjet printer by Epson.  Pigment inks give an image transfer that is nearly as crisp as a laser jet or photocopier. If you use a printer with water soluble inks, you will get a faint transfer, if any, when using this technique.
**IMPORTANT:  NEVER EVER use copyrighted images (especially if they're mine).


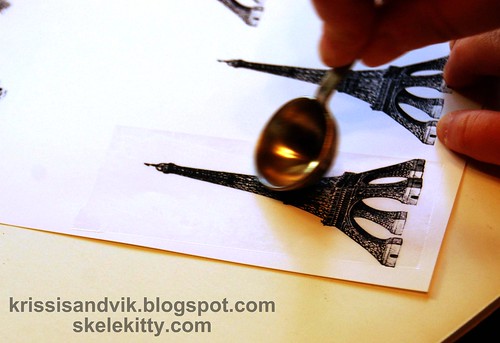
Place a piece of packing tape carefully over your printed image. Avoid getting wrinkles or bubbles in or under your tape.
Tape Transfer tutorial


Using your bone folder or the smooth side of a spoon, burnish (rub!) the tape to ensure complete contact between the ink/paper and the adhesive.
Tape Transfer tutorial


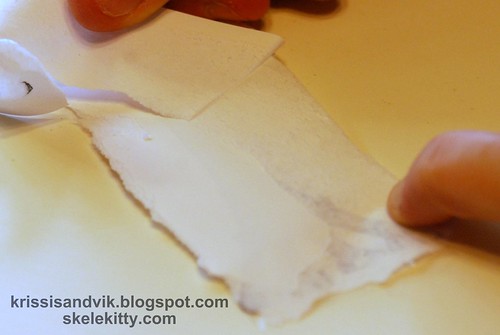
Tear away the extra paper from the edges of your tape, turn your image over and peel away some of the paper from the back.  You do not need to peel off all of the paper, but removing some will help the water to penetrate and will make your life a lot easier about 2 steps down....
Tape Transfer tutorial


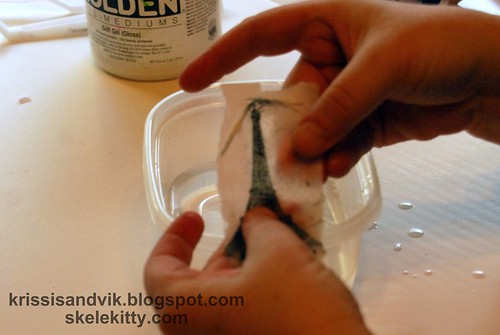
Submerge your image in a small bowl of room temp/cool water for a few minutes (5 to 10 is usually good, but if you forget it for a couple of hours, don't panic - it's all good).
Tape Transfer tutorial


Using only your fingers, gently rub the paper until it starts to pill up.  Continue to rub at all of the paper residue until it is completely gone.  Your tape will not be crystal clear, but you should not feel any rough spots or bits of paper left.
Tape Transfer tutorial


Once you have removed all of the paper residue, let your tape dry on a paper towel.
Tape Transfer tutorial


Trim up your image and do a dry fitting. Trim more if needed.
Tape Transfer tutorial


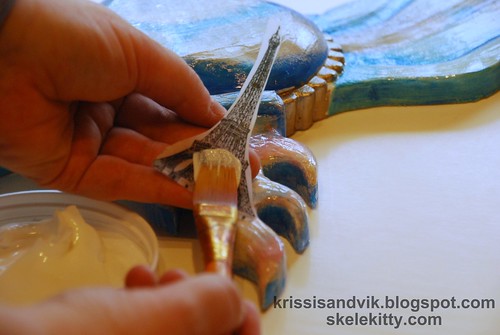
Spread a generous amount of gel medium on your working surface and brush some on the back of your image/tape.
Tape Transfer tutorial


The tricks (and the part where you get messy!):
  • Place your image on your working surface and put a little gel medium over the top to reduce friction.   
  • Using your fingers and starting from near the center of your image, press down gently, but firmly and rub out any bubbles.  
  • Continue to press and rub firmly working outward so that all of the gel medium is pressed out from under the tape (you'll be able to tell when there are no white spots under the tape).  
  • Run your fingers around the edges to ensure complete contact. You are going for as close to 100% contact between the tape and your working surface as you can achieve.  
This little trick will not only help eliminate the appearance of "bumps" around the edges of the tape, but will also reduce your drying time!

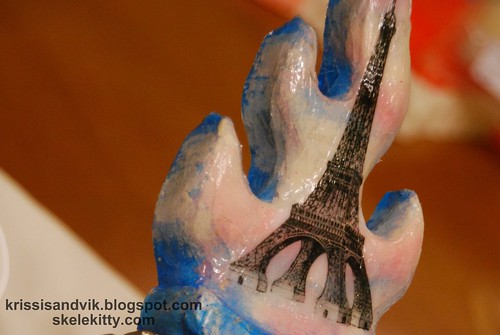
Troubleshooting tips for working on an uneven surface (like this lovely plaster heart here carved and mold poured by my pal and all around nice dude, Cesco). If you are working on an undulating surface, you may not be able to achieve 100% contact between the tape and your piece. So, here's what you do:
  • Lifting beneath the image
      1. Change your uneven surface into an even surface by adding gel medium and leveling it with a credit card or the edge of a spatula.  Let it dry, then start over with a new transfer (you don't want all the old gel medium gunking it up).
      2. Follow the instructions above, but use the side of your finger to press out the extra gel medium from beneath your image.  You will see white spots of gel medium where your image was previously lifting.  Pretend you don't see them.  Your drying time will be increased, but your image will be perfectly adhered in the end.
      • Lifting at the edges
        1. Since tape will not stretch to follow curves, try trimming the edges of your image if that is where the lifting is occurring
        2. A trick I learned for sewing curves: Rather than trimming away excess tape, try snipping inward toward your image in the problem area.  
        3. Use a trick similar to #2 under Lifting beneath the image - use light pressure around the edges and allow gel medium to take up the space between your tape edges and your working surface.
        4. Did you do a dry fitting?  Really?  Are you sure?  I don't think you did.  Either that, or you were in denial and thought this would fit (silly you).  Go back and resize your image and try again WITH A DRY FITTING THIS TIME.
      Trick #2 for keeping the edges from lifting:

      snip inward toward (not into) your image

      To finish: Add a generous layer of gel medium over the top of the image to blend away the edges of the tape.  Your image will look cloudy/milky at first. Let it dry. Drying time can vary from a few minutes to a day or two depending on thickness of gel layers, porosity of your working surface, temperature and humidity.
      Tape Transfer tutorial


      Now GO FORTH AND TRANSFER THY IMAGES!

      Tape Transfer tutorial


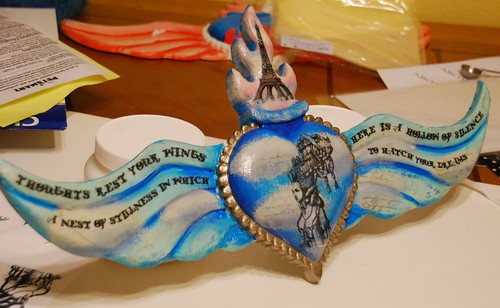
      Here's a pic of the winged sacred heart I'm creating for my ol' school pal, Sam.  It's still in progress, but you can see several other tape image transfers (my apologies for the messy photo background).
      Tape Transfer tutorial


      Other stuff you can do with packing tape (I'll continue to update this as ideas come to me):
      • Using rubber stamps and Staz On (solvent based) or Archival inks, stamp onto the clear side of the tape and then follow the application instructions above (you know to let your ink dry fully first, right?  I didn't need to tell you that, did I?)  Oh, and you do stamp/transfers with tissue paper too, but you get a much different look.
      • For a "ghostly" looking transfer, use an inkjet printer to create your images.
      • To transfer larger images, you can "butt" the tape edges up against each to pull the ink, then do it again when putting down your image(s).  Or, if you're lucky and you can find it...
      • You can use the above techniques with clear CON-tact® paper for larger images!
      • Oh, and YES, you can do this technique with colored copies for a really cool effect.

        Krissi Sandvik is a mixed-media artist and the owner of Krissi's Art Studio, home of Skelekitty and Friends. She was recently named "best tutorialer on the web" by her friend Rachelle Rose and she publishes a tutorial or "Ask Krissi's Art Studio" feature every Friday.